
Water Purification
Water is a precious resource, but not all water is potable and ready for consumption. Since water is “the universal solvent,” it can dissolve many substances. Luckily, the physical and chemical properties of water and the solutes allow for purification if the water has been polluted. One method of water purification that students can model and re-engineer in the lab uses distillation and condensation.
For this activity you can collect a sample of water from any local source - a stream, creek or pond. Don’t go chasing waterfalls because you could also prepare your own sample. The “dirty” water sample below was made right here at PASCO with some tap water, salt, starch and food coloring to make the changes more visual.
The first step is to make observations and measurements of the original sample. The blue color was obvious, but we also need to use sensors to measure the any unseen solutes.
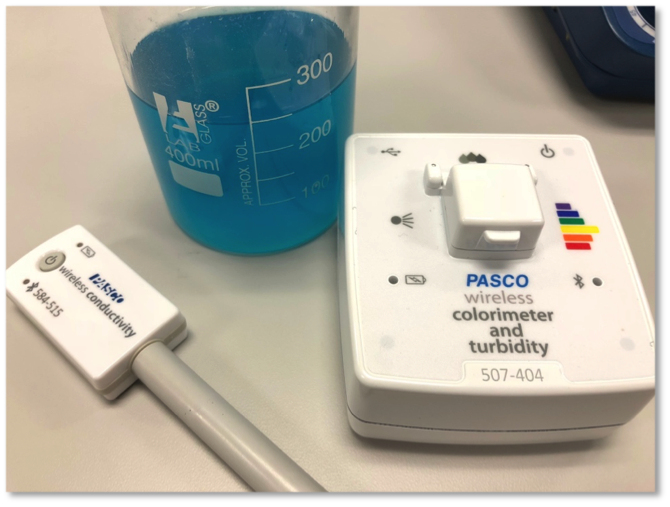
First up, we can use the Wireless Conductivity Sensor to keep an eye on the ions by measuring any dissolved ionic solutes.
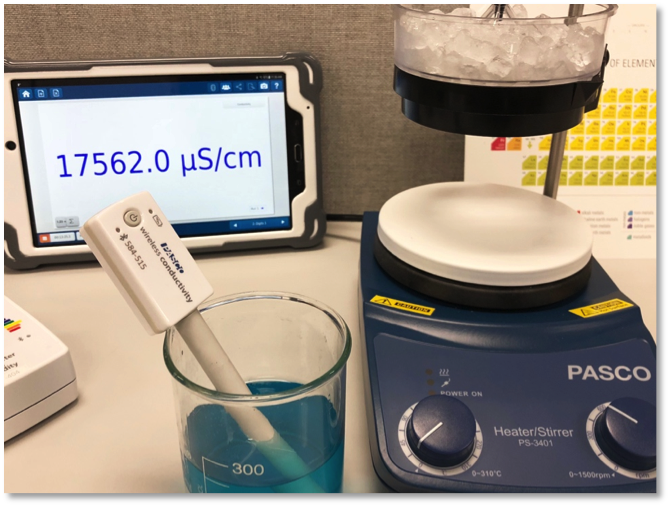
The conductivity reading is 17562 mS/cm. It isn’t apparent by looking at it, but the sensor makes it clear - there is a significant concentration of salts in the sample.
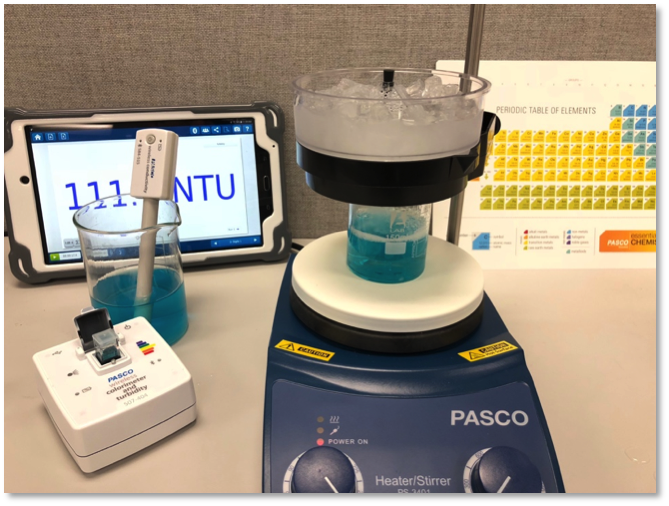
There’s no smoke in the water, but you can tell by looking closely that it is a little cloudy. The measure of cloudiness is called turbidity. We can use the Wireless Colorimeter and Turbidity Sensor to quantify the cloudiness.
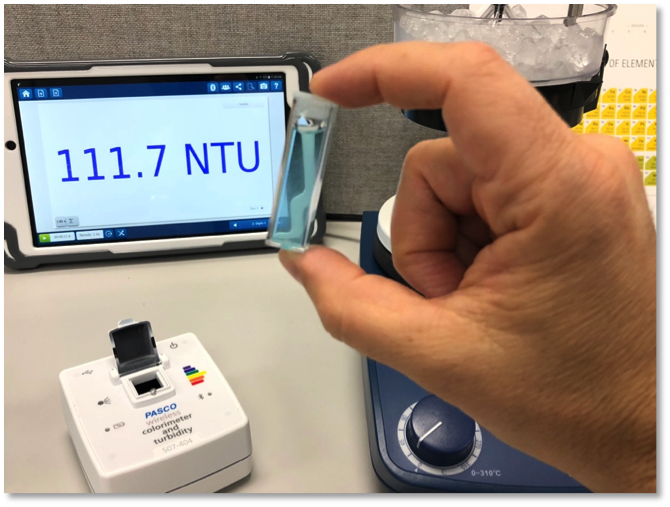
The turbidity measures 111.7 NTUs. The data is clear, the water is cloudy. Based on the original observations and data, the water is blue, it has some dissolved ionic solutes, and it also has some larger dissolved particles creating a suspension.
Now for the fun part. It is time to purify the sample!
Some of the sample is poured into a small beaker, placed on a hot plate, and turned to the highest setting. In the image below, what you see isn’t a bridge over troubled water - it’s the new PASCO Condenser. The Condenser, with ice, is positioned over the beaker. As the “dirty” water boils, steam evaporates. The steam then hits the underside of the cold Condenser top and condenses from the gaseous state back into a liquid. Once in liquid form, it collects in the black bottom of the Condenser.
Let it boil for 15 minutes, and you should collect about 10 mL of “clean” water. Pour it into a test tube and let's compare it to the original.
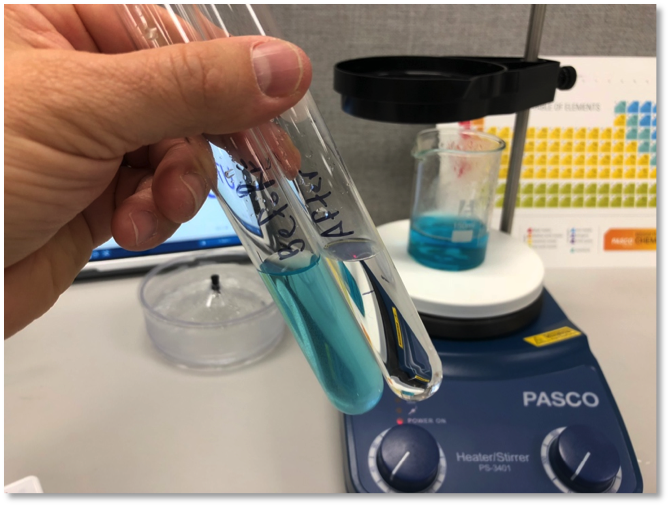
It definitely looks more pure. We can now see that it’s a clear, colorless liquid. But we need to collect more evidence to see if the purification was successful.

The data indicates that the water is as clean as it looks! Both the conductivity and the turbidity measurements are now close to zero.
With this activity your students can gain some practical experience with a classic purification technique. The sensors provide them with clear evidence of the effectiveness of the process. The next step is to challenge your students to design and build their own purification system!


